
If you love candles as much as we do around here, it is only a matter of time before you want to make your own candles – like making this easy jellybean candle! Last year we gave our list of some of the best jellybean candles we could find. But while Spring is in the air and we are still somewhat stuck inside, this is a great do-it-yourself project for you and the family. With this quick tutorial, we’ll show you how to make a soy candle with a little bit of jellybean extra!
Step 1: Gather Your Supplies
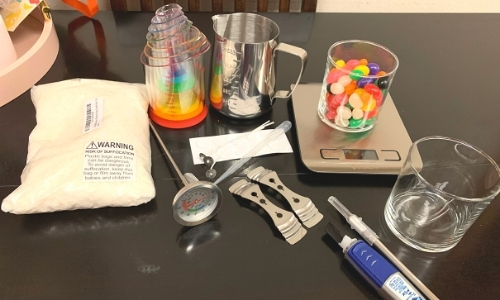
You’ll need some basic candle making supplies for this project. You can improvise on some things, but there are certain items that may require a trip to the craft store if you don’t already have them on hand. Some items below are optional, and we’ll point those out to you.
- Candle pouring pot
- Wicks with wick tabs
- Wick stabilizer
- Jar candle (we prefer something clear so you can see the jellybeans)
- X-acto knife
- Super glue
- Jellybeans! (Any kind will do, but the larger beans work best. We used Brach’s Jellybean Bird Eggs)
- Kitchen scale
- Thermometer
- Wax (we used soy)
- Fragrance (optional)
- Pipettes (optional, for use if using fragrance)
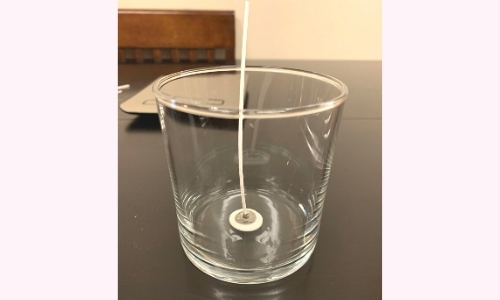
Step 2 Prep Your Jar
Start with a clean, empty jar to make your candle. We prefer a clear jar for this project, so that you can see the beauty of your jellybeans inside. Here we’ve used an 8oz container – smaller is better when making your jellybean candle. We decided to be a little extra with our candle, so we decorated the outside of the jar with…you guessed it…jellybeans! First get your wick placed in the center of your jar.
Then take some of your larger jelly beans and cut them lengthwise with your X-acto knife. Be VERY careful during this step – a homemade jellybean candle is not worth losing a finger over!
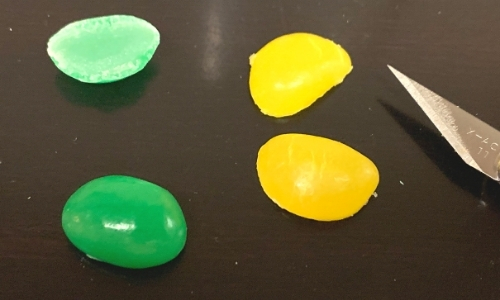
Now take the jellybean slices and place a small bit of super glue on the cut side. Stick these randomly around the outside of your jar. Be sure to press gently so you don’t crack the “shells” of your jellybeans. It’s important to eat a few jellybeans at this point, just to make sure you maintain your stamina.

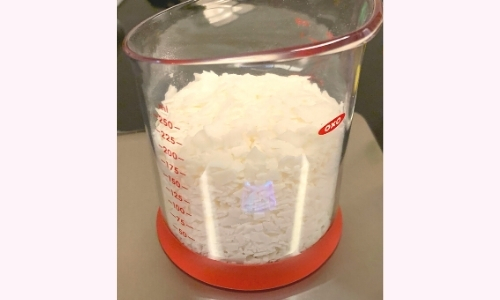
Step 3 Melt your wax
We are going to make an 8 ounce candle, but we’re going to do it in two phases. First measure out about 5 ounces of wax (or approximately 2/3 of what you need for your size jar). Melt this wax in your double boiler.
If adding fragrance, let your wax cool several degrees and then add your fragrance to the pot of melted wax.
Step 4 Make your first candle layer
While your wax is cooling a bit, fill your jar with jellybeans. We filled our jar about 2/3 of the way full. Stabilize your wick with your wick stabilizer – we used the metal clips, but a pencil or popsicle stick will do. You just want to make sure the wick stays centered and straight as you pour in the wax.
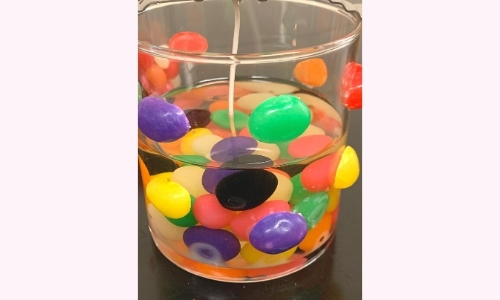
Pour the melted wax over the jellybeans. Nope…your jellybeans won’t melt or dissolve. Allow your first layer to completely cool.
Step 5 Make your second candle layer

Measure out the remaining 1/3 of wax needed (we needed 3 more ounces of wax) and melt it. If you want to be extra-extra, you can add a little candle dye to this layer to give your candle a two-tone look.
Gently pour your hot wax over the top layer. While it was still hot, we added a few jellybeans to the bottom of this layer.
Allow this layer to start cooling. Then when it is semi-hard, strategically add a few more jellybeans to your top layer. Now allow the candle to fully cool.
Step 6 Light & Enjoy
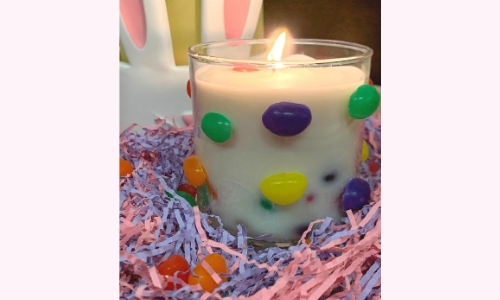
Voila! There you have it. Your homemade jellybean candle is ready for gifting or just lighting to enjoy yourself at home. Wasn’t that easy?
This post may contain affiliate links. This means that if you click through one of them and make a purchase, Candlefind may receive a small commission, at no additional cost to you. It is your ongoing support that helps make Candlefind successful, and for that we are thankful.


