
This post may contain affiliate links. This means that if you click through one of them and make a purchase, Candlefind may receive a small commission, at no additional cost to you. It is your ongoing support that helps make Candlefind successful, and for that we are thankful.
As a candle lover, you have to know how to recycle used candle jars. Whether you burn through one or ten (kudos!) candles in a week, most candle lovers inevitably are left with the used candle jar dilemma. For example, let’s say you blew through all the candles on our best ice cream candles list. What to do? Sure, you could toss them all…but is that wise or enviornmentally safe? If you’re generally a tosser (or have just run out of ideas), we are here to help. We’ve rounded up a handful of ways to recycle your used candle jars to get even more life out of that beloved candle.
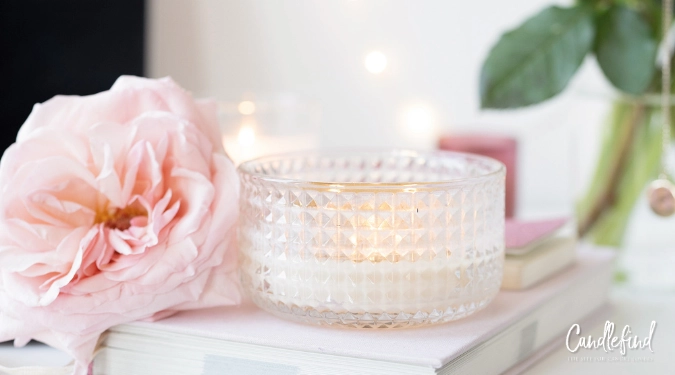
How To Clean Your Candle Jars

- Oven method: Place your used candle on a cookie sheet in a low-heat oven for approximately 10 minutes. This should melt the remaining wax and help loosen the glue on your wick. Carefully remove and pour out the liquified wax. Use a butter knife to remove the wick(s), and then wipe the jar clean with a dry paper cloth or lint-free towel. When using this method, we like to pour the liquified wax into a wax melt tray to later enjoy scented wax melts!
- Freezer method: This method is super easy and isn’t as time-sensitive as the oven method above. Place your used candle in the freezer and allow it to sit for at least 30 minutes. You can leave it longer, but at least 30 minutes will ensure it is hard enough to remove the wax. Ease of removal will depend on the type of wax used, but you should be able to pull most wax straight out in one piece. For some types of waxes, you will need to break it up into chunks to remove. Agan, don’t waste that scented wax! Use it for your wax warmers or blend it with other wax chips to make your own special scent.
- Boiling water method: Pour some hot, boiling water directly into your used candle jar. As the water cools, the wax will rise to the top, making it easy to remove. Just remember to wait until the water cools off before sticking your fingers into the water!
Glam Makeup Brush Holder

How to get the look:
- Using well-mixed Mod Podge, thinly coat the inside of your empty candle jar using an old makeup brush or small paintbrush. If you want to get fancy-like, you can stagger the lining for gradient coloring of your candle jar.
- Pour a generous amount of glitter inside, and roll the jar around to get it coated. If you are layering the colors, of course, you will repeat the Mod Podge step above and then use your different color glitter to coat again. Work quickly but steadily so that you get a good coating.
- Allow the new makeup brush holder to dry completely. While there are no hard-fast rules, I would recommend at least the next 4 or 5 hours to allow things to “set.”
- Fill the candle jar with something to keep your brushes upright and looking pretty. While Dwell Beautiful has used poly pellets, you can use a number of other options that will work just as well:
- Sand
- Glass beads
- Rice
- Steel beads
- Stones
Those are just a few options and your choice will depend on what you have available and the overall look you’re going for. For our makeup brushes, we liked the notion of these small glass beads, for example.
You can find where we got this idea on how to make a makeup brush container from old candle jars.
The above steps work best for clear candle jars, but you can load up the inside of decorative candle jars, too. Just fill them with your choice and arrange your makeup brushes! It’s a great way to recycle used candle jars.
Coffee or Tea Holder
Coffee & tea lovers rejoice! This particular do-it-yourself project is great for all those leftover 3-wick tumbler style candles from the likes of Bath & Body Works. Of course, any wider style candle would work that comes with a lid.

How to get the look:
- You will need a cricut machine like this one, some vinyl, and transfer tape in order to make your beautiful labels. While you’re at it, it helps to have this handy tool set to get your labels cut and the way you want them.
- Design and cut your labels to fit around your round-style jar.
- For the lid, you can use any style cabinet door knobs you like. Center and glue these in place at the center of the lid.
- Allow the lid with the new “handle” to dry completely before use, particularly if planning on using the containers in a high-humidity area such as the bathroom.
Once you make these, you’ll become addicted and find yourself placing them all over the house. This is a fun project for kids to join in, too!
Planter
Used candle jars make excellent planters for small plants that don’t require a lot of drainage. You can get a cute look and have something living to take care of!

How to get the look:
- Line the bottom of your cleaned candle jar with your choice of drainage material. You can use either activated charcoal or a layer of rocks/gravel. This step is important so that your plants stay healthy and don’t develop root rot.
- Decide on your plants and insert them carefully. We recommend small plants that don’t require a lot of watering, such as cacti or succulents.
- Now fill the rest of your container with potting soil.
- Water your plants carefully and just to moisten the soil, do not overwater.
This is a great way to add greenery around your house or even at your office. Just be sure to remember that these plants need sunlight, too, so either place them appropriately or be sure to take them on sun dates.
Tinted Mason Jars
Tinting mason jars can be a lot of fun and the results are gorgeous! You can use them for wedding or party decorations, or even just around the house.

How to get the look:
- Mix a small amount of ModPodge with gel food coloring of your choice. Start with just a little food coloring as you can always add to it for a deeper intensity.
- Coat the inside of your mason jar with your Mod Podge mixture. Roll the jar around until you get the inside coated evenly.
- Now turn your mason jar upside down on a cooking sheet lined with parchment paper. Place the cooking sheet into your oven that’s heated to 185.
- After about 20 minutes, you will turn the mason jars right side up, turn off the oven, and slide the jars back inside to “cook” a little longer.
This is such a fun way to recycle used candle jars. The rainbow of colors you can create are limitless and you can fit just about any decor with these. You can also paint the outside of used mason jars to get a distressed look. We’ll post a separate tutorial on this fun activity soon.
Desk Organizer
Empty candle jars can be used to store just about any small and medium sized items, epecially ones you might use at your office desk. You can have one hold pens and pencils. Or what about one to hold your staples or push pins? The opportunities are limitless!

How to get the look:
- Choose a decorative jar for this look, with more unusual patterns or colorings making great statements.
- Once cleaning out the jar, just load it with pens, pencils, or other items that will fit.
- It’s ok if you have a plain, clear jar as you can decorate it with glitter, stickers, and more.
You can use 2 or 3 different sizes and looks at your desk for a chic style. Rotate them out according to season changes or make a change out every month. Super fun!
There are dozens of other ways that you can recycle used candle jars. Try some of these or others out and you’ll be hooked. Let us know your creative ways to use your own old candle jars by commenting below.


0 Comments